The Honeywell Pro Series Thermostats are advanced, user-friendly climate control solutions designed for smart home integration and energy efficiency. They offer seamless installation, compatibility with various HVAC systems, and intuitive programming options to enhance home comfort. Perfect for modern households, these thermostats ensure precise temperature control and reduced energy consumption through innovative features and easy-to-follow installation guides.
Overview of Honeywell Pro Series Thermostats
The Honeywell Pro Series Thermostats are a line of advanced, programmable climate control devices designed for compatibility with modern HVAC systems. Models like the T6 Pro, T4 Pro, and T3 Pro offer features such as touchscreen interfaces, smart home integration, and energy-saving modes. These thermostats are known for their ease of use and ability to optimize heating and cooling systems for maximum efficiency. They support various system types, including heat pumps and dual-fuel systems, and come with installation kits that include wallplates, mounting hardware, and adapters. The Pro Series also includes optional cover plates for a sleek appearance and compatibility with the Honeywell Home app for remote control and scheduling.
Importance of Proper Installation
Proper installation of Honeywell Pro Series Thermostats is crucial for ensuring optimal performance, safety, and energy efficiency. Incorrect wiring or mounting can lead to system malfunctions, increased energy bills, and potential damage to the thermostat or HVAC system. Following the manufacturer’s instructions ensures compatibility with existing HVAC setups and guarantees reliable operation. Additionally, correct installation preserves the product warranty and enhances user experience by allowing full access to features like smart home integration and programmable settings. It also prevents safety hazards such as electrical issues or improper heating/cooling, which could pose risks to occupants. Adhering to the installation guidelines ensures a seamless and efficient setup, maximizing the thermostat’s benefits for home comfort and energy savings.
System Compatibility and Requirements
Honeywell Pro Series Thermostats are compatible with most HVAC systems, including heat pumps and dual-fuel systems. They require 18- to 22-gauge thermostat wire and a C-wire for power.
Compatible HVAC Systems
Honeywell Pro Series Thermostats are designed to work with a wide range of HVAC systems, ensuring versatility for different home setups. They are compatible with traditional gas, oil, and electric furnaces, as well as heat pumps and dual-fuel systems. These thermostats also support multi-stage heating and cooling systems, providing precise temperature control. Additionally, they can be integrated with smart home systems, offering enhanced functionality. The compatibility extends to various system configurations, making them suitable for both new and existing HVAC installations. This flexibility ensures that users can enjoy efficient and consistent climate control regardless of their specific heating and cooling requirements.
Necessary Tools and Materials
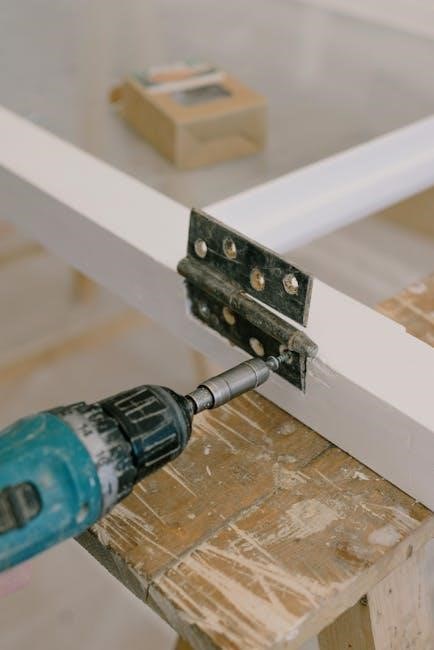
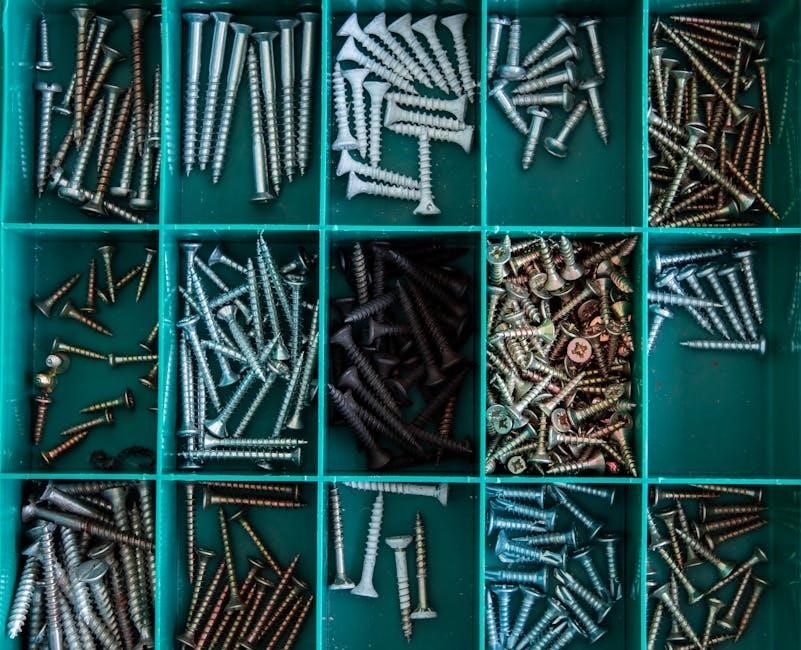
Installing a Honeywell Pro Series Thermostat requires specific tools and materials to ensure a successful setup. Essential tools include a screwdriver, pliers, wire strippers, and a voltage tester to safely handle electrical connections. A level is also recommended for proper wallplate alignment. Materials needed include the UWP (Universal Wall Plate) mounting system, wall anchors, and screws, all of which are typically included in the thermostat package. Additional items like a J-box adapter and decorative cover plates may be required depending on your setup. Ensure all wires are 18- to 22-gauge for compatibility. Optional tools, such as a drill, may be needed for specific installations. These tools and materials ensure a secure and efficient installation process, aligning with the thermostat’s smart features and energy-saving capabilities.
Pre-Installation Setup
Before installation, ensure compatibility with your HVAC system, turn off power, and gather necessary tools like screwdrivers and wire strippers. Prepare the wall and materials for a smooth setup.
Turning Off Power to the HVAC System

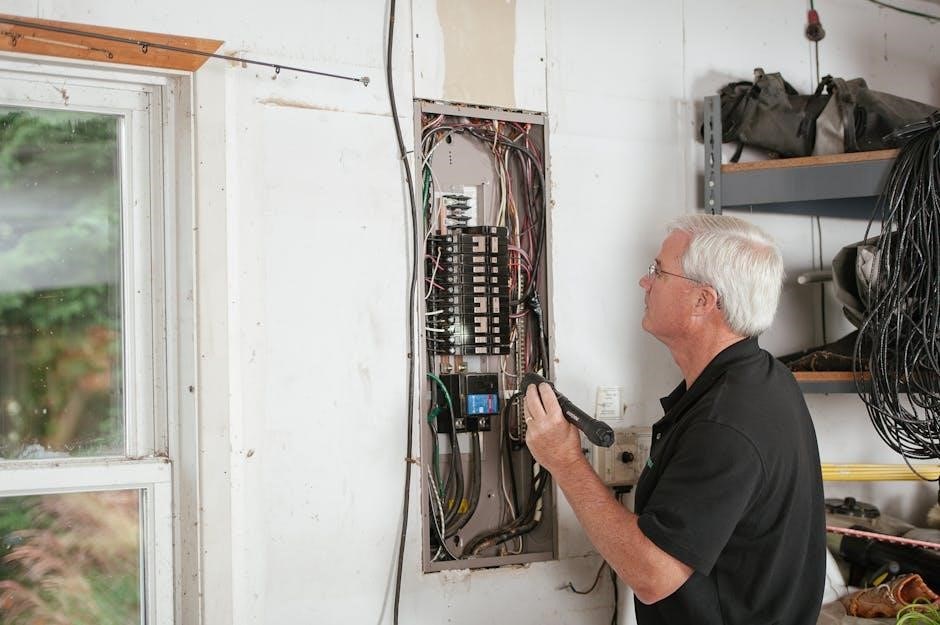
Before starting the installation, ensure the HVAC system is completely powered off to avoid electrical hazards. Locate the circuit breaker controlling the HVAC system and switch it off. Verify the system is off by checking if fans or compressors stop running. Do not rely on the thermostat switch alone; always use the circuit breaker for safety. Use a multimeter to confirm there is no voltage at the thermostat wires. This step is critical to prevent electrical shocks or damage during installation. Once the power is off, proceed with removing the old thermostat and preparing for the new one. Always follow safety guidelines to ensure a secure installation process.
Removing the Old Thermostat
Start by ensuring the HVAC system is powered off at the circuit breaker. Remove the thermostat cover by gently pulling it away from the wall. Disconnect the wires from the old thermostat, noting their colors and positions for later reference. Carefully pull the thermostat away from the wallplate or mounting system. If the old thermostat is held by screws, remove them using a screwdriver. For wireless models, simply detach the battery. If the thermostat uses a wallplate, remove it as well to access the wiring. Handle the wires with care to avoid damage. Once the old thermostat is removed, inspect the area for any debris or old adhesive. Clean the wall if necessary to ensure a smooth installation of the new Honeywell Pro Series thermostat.

Preparing the Wall for Installation
Before installing the new Honeywell Pro Series thermostat, ensure the wall is properly prepared. Inspect the area for any damage or old adhesive from the previous thermostat. Clean the wall surface to remove dirt, dust, or residue. If using the Honeywell UWP mounting system, align the wall anchors with the studs for secure installation. For walls with uneven surfaces, use the provided decorative cover plate to conceal any gaps or paint marks. Ensure the wall is dry and free of moisture to prevent damage to the thermostat or wiring. If necessary, lightly sand the area to create a smooth surface. Finally, verify that the wall can support the weight of the thermostat and mounting system. This preparation ensures a secure and professional-looking installation.

Installation Steps
The Honeywell Pro Series thermostat installation involves securing the wallplate, wiring the system, and configuring settings. Follow the manual for step-by-step guidance. Ensure all connections are secure and test the thermostat post-installation to confirm proper functionality. Use the Honeywell Home app for additional setup support.
Mounting the Wallplate
Begin by removing the battery holder from the Honeywell Pro Series thermostat to access the wallplate. Identify the wall type (drywall, plaster, or junction box) and use the provided wall anchors for secure installation. Align the wallplate with the marks made during preparation, ensuring it is level. Gently press the wallplate into place and secure it using the screws provided. Tighten firmly but avoid over-tightening to prevent damage. If necessary, use the optional decorative cover plate to conceal any paint gaps or uneven surfaces. This step ensures a clean and professional installation, ready for wiring and configuration. Follow the manual for specific wallplate mounting instructions tailored to your HVAC system type.
Wiring the Thermostat
Use 18- to 22-gauge thermostat wire for secure connections. Match the wire labels (R, W, Y, G, C, O/B) to the corresponding terminals on the Honeywell Pro Series thermostat. For heat-only systems, connect R and W. For cooling, connect R and Y. Heat pumps require R, Y, and O/B wires. Ensure all connections are tight and properly seated. Refer to the installation manual for system-specific wiring diagrams. After wiring, double-check connections to avoid errors. If unsure, consult the manual or a professional. Proper wiring ensures reliable operation and prevents system malfunctions. Follow the guide carefully to complete this critical step accurately.
Configuring Thermostat Settings
After wiring, navigate to the thermostat menu to configure settings. Select the system type (heat-only, cool-only, or heat pump) and the number of heating and cooling stages. Choose the fan operation mode (auto or continuous). For advanced setups, access the Installer Setup menu to configure options like two-stage heating or cooling. Ensure the settings match your HVAC system specifications. Use the Honeywell Home app for additional configuration features. Refer to the manual for detailed instructions on each setting. Proper configuration ensures optimal performance and energy efficiency. If unsure, consult the installation guide or contact a professional for assistance. Correct settings are crucial for reliable operation and desired comfort levels.
Post-Installation Setup
After installation, program the thermostat with your preferred schedule and settings. Connect it to Wi-Fi for remote control and smart features. Use the Honeywell Home app to customize settings, monitor energy usage, and receive system alerts. Ensure all configurations are saved and test the system for proper operation. This step ensures seamless integration with your HVAC system and optimizes performance for energy efficiency and comfort.
Programming the Thermostat

Programming the Honeywell Pro Series Thermostat allows you to customize temperature settings for different times of the day and week. Start by accessing the menu through the touchscreen interface. Select the “Schedule” option and choose between 4, 5, or 6 periods per day, depending on your model. Set the desired temperature for each period, ensuring it aligns with your daily routine. For example, lower the temperature when you’re away or asleep to save energy. Use the “Hold” feature temporarily override the schedule if needed. Save your settings and test the programmed schedule to ensure it operates correctly. This feature enhances energy efficiency and comfort by automating temperature adjustments.
Connecting to Wi-Fi
To connect your Honeywell Pro Series Thermostat to Wi-Fi, start by ensuring your thermostat is in setup mode. Navigate to the menu, select “Wi-Fi Setup,” and choose your network from the list. Enter your password using the on-screen keyboard. Once connected, download and install the Honeywell Home app from the App Store or Google Play. Open the app and follow the in-app instructions to link your thermostat to your account. Ensure your router is functioning properly and within range. If connection issues arise, restart the thermostat, check your network password, or consult the user manual for troubleshooting steps. A successful connection enables remote temperature control and smart home integration.
Setting Up the Honeywell Home App
Setting up the Honeywell Home app is essential for remote control and advanced features of your Pro Series Thermostat. Begin by downloading the app from the App Store (iOS) or Google Play (Android). Open the app and create a Honeywell Home account or log in if you already have one. Once logged in, select “Add Device” and follow the in-app instructions to link your thermostat. Ensure your thermostat is connected to Wi-Fi and in pairing mode. The app will guide you through syncing your thermostat and setting up features like geofencing, scheduling, and energy usage tracking. After setup, you can monitor and adjust your home’s temperature, receive notifications, and optimize energy usage from anywhere. This seamless integration enhances convenience and efficiency.
Testing the System
After installation, test the system to ensure proper operation. Verify heating, cooling, and fan functions. Check temperature accuracy and system responses to thermostat commands for smooth performance.
After installation, verify heating and cooling operations to ensure the system functions correctly. Set the thermostat to heat mode and check if the heating system activates. Similarly, switch to cool mode and confirm the cooling system starts. Monitor temperature changes to ensure accuracy. Use the Honeywell Home app to track real-time performance and adjust settings if necessary. Proper operation ensures optimal comfort and energy efficiency. If issues arise, refer to the troubleshooting section or the installation manual for guidance. This step ensures your Honeywell Pro Series thermostat operates seamlessly with your HVAC system. After verifying heating and cooling, check the fan operation to ensure proper airflow. Switch the thermostat to fan mode and listen for the fan starting. Ensure it runs smoothly without unusual noises. Test auto mode to confirm the fan cycles correctly with heating or cooling. Use the Honeywell Home app to monitor fan performance and adjust settings if needed; If the fan doesn’t operate, check wiring connections and ensure the fan is configured properly in the thermostat settings. Proper fan operation is crucial for consistent airflow and system efficiency. Refer to the installation manual for troubleshooting guidance if issues persist. Address issues like no display, incorrect temperatures, or wiring problems by checking power, connections, and configuration. Restart the thermostat or refer to the manual for solutions. Wiring issues are common during thermostat installation. Ensure all connections match the wiring diagram in the manual. Loose wires or incorrect connections can cause malfunctions. Verify that the thermostat wire gauge (18-22 AWG) is compatible and that no wires are damaged. For heat pumps, ensure proper configuration in Installer Setup. If the display is blank, check power supply and wiring connections. Consult the manual for specific wiring requirements based on your HVAC system type. If issues persist, restart the thermostat or consult a professional. Proper wiring ensures reliable performance and safety. Always refer to the Honeywell Pro Series installation guide for detailed troubleshooting steps. Configuration errors can prevent the thermostat from functioning properly. Ensure the system type (e.g., heat pump, furnace, or AC) is correctly set in the Installer Setup menu. Verify that the heating and cooling stages match your HVAC system. If issues arise, reboot the thermostat by removing batteries or power cycling. Use the Honeywell Home app to check settings and update configurations remotely. For advanced setups, refer to the installation manual for specific programming instructions. Common errors include incorrect stage configurations or fan settings. Always test the system after adjusting settings to confirm proper operation. If problems persist, consult the troubleshooting section of the manual or contact Honeywell support for further assistance. Regular maintenance ensures optimal performance. Clean the thermostat display and sensors with a soft cloth. Replace batteries annually or as needed. Update software periodically for enhanced functionality and efficiency. Routine checks help prevent issues and extend the thermostat’s lifespan, ensuring reliable temperature control and energy savings. Regular cleaning is essential to maintain the Honeywell Pro Series Thermostat’s performance. Start by turning off power to the HVAC system at the circuit breaker. Gently wipe the thermostat’s display and sensors with a soft, dry cloth to remove dust and debris. Avoid using harsh chemicals or wet cloths, as they may damage the components. For tougher stains, lightly dampen the cloth with water, but ensure it is thoroughly dry before wiping. Clean the faceplate separately if it is removable, using the same method. Regular cleaning prevents dust buildup, which can interfere with temperature sensing and operation. This simple maintenance step ensures accurate temperature control and extends the lifespan of your thermostat. To ensure optimal performance, keep your Honeywell Pro Series Thermostat software up to date. Connect the thermostat to Wi-Fi via the Honeywell Home app and check for firmware updates. Follow the on-screen instructions to download and install the latest version. Always keep the thermostat powered during updates to avoid interruptions. The Honeywell Home app will guide you through the process, ensuring your device runs with the newest features and security patches. Regular software updates improve functionality, add new features, and enhance compatibility. Enable automatic updates in the app settings for convenience. If issues arise, restart the thermostat and app before retrying. Keeping your thermostat updated guarantees a seamless and efficient smart home experience. With proper installation and setup, the Honeywell Pro Series Thermostat ensures efficient and precise temperature control, enhancing home comfort while saving energy. Regular updates and maintenance guarantee optimal performance and long-term convenience. After completing the installation, perform a thorough inspection to ensure all components are securely connected and functioning correctly. Verify that the thermostat is properly mounted on the wall and that all wires are tightly connected to their respective terminals. Check the HVAC system’s response to thermostat commands, ensuring heating, cooling, and fan operations work as expected. Review the configuration settings to confirm they match your system requirements, such as heat pump or furnace specifications. Test the thermostat’s display accuracy and responsiveness. Also, look for any error messages or alarms, addressing them according to the manual’s troubleshooting guide. Finally, review the installation checklist to confirm all steps were followed correctly, ensuring safety measures like power disconnection were observed. This comprehensive verification ensures optimal performance, reliability, and energy efficiency. For further assistance, refer to the official Honeywell Pro Series Thermostat Installation Manual, available for download as a PDF on the Honeywell website. This comprehensive guide provides detailed step-by-step instructions, wiring diagrams, and troubleshooting tips. Additionally, the Honeywell Home app offers interactive installation guides and remote monitoring features. Visit the Honeywell support page for video tutorials, FAQs, and customer support contact information. For specific models like the T6 Pro or T10 Pro, consult the respective product pages for tailored resources. Ensure you have the correct model number (e.g., TH3110D1008 or TH3210D1004) when accessing documentation. These resources are designed to simplify the installation and operation process, ensuring optimal performance of your Honeywell Pro Series Thermostat.Verifying Heating and Cooling Operations
Checking Fan Operation

Troubleshooting Common Issues
Resolving Wiring Issues
Fixing Configuration Errors
Maintenance and Care

Cleaning the Thermostat
Updating Software
Final Checks and Verification
Additional Resources